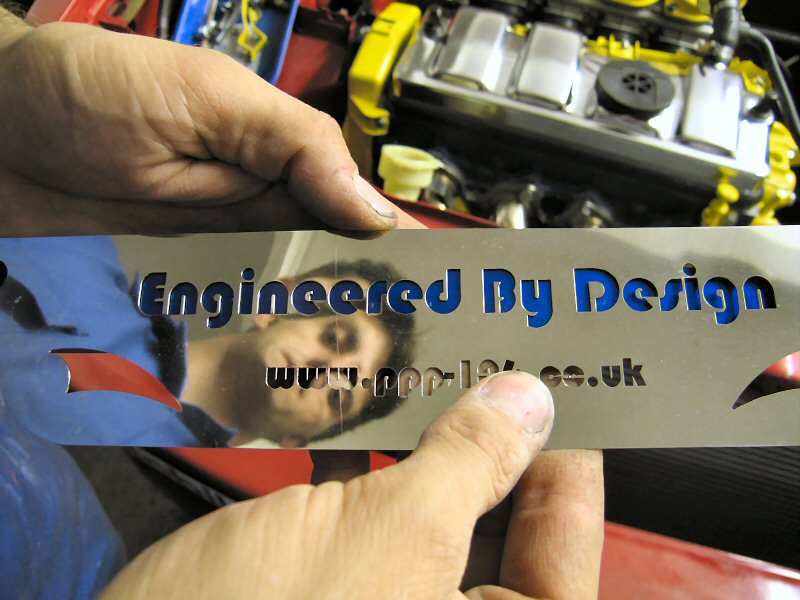
Anodising converts the surface of an aluminium part into a hard, porous aluminium oxide layer that can absorb dye and is then sealed. The result is a surface that is significantly harder and more corrosion-resistant than bare aluminium, with a colour that goes into the material rather than sitting on top of it. Done correctly on a small workshop scale, the results are indistinguishable from commercial work. The fuel rail and fuse plate shown in the gallery below were both done on a bucket-based setup.
The Six Steps
Type II sulphuric anodising follows the same sequence whether you are running a professional tank line or a row of buckets on a garage bench. Not all steps are mandatory for every part – see the notes column.
| # | Step | What and why | Conditions |
|---|---|---|---|
| 1 | Clean | Remove oil, grease, cutting fluid and fingerprints. Contamination at this stage causes patchy anodising. Dish detergent and hot water works for one-off parts. Commercial aluminium cleaner (e.g. "740" prep cleaner) at 65°C gives more consistent results on batch work. | 5–10 min soak or scrub. Rinse well. |
| 2 | Etch | Caustic soda (sodium hydroxide / lye) solution dissolves a thin surface layer, removing machine marks and giving a consistent matte appearance. Skip this step if you want to preserve a polished or machined surface – the acid will slightly magnify any surface texture it finds. | Room temperature. 10–60 seconds depending on desired finish. Rinse immediately. |
| 3 | Desmut | Etching leaves a dark smut on alloys containing copper, silicon or manganese (2024, 7075, cast alloys). Nitric acid solution removes it. Essential for 2024 and cast aluminium. Can be skipped on 6061/6082. | Room temperature. 1–3 min. Rinse well. |
| 4 | Anodise | The part (anode, positive terminal) is suspended in dilute sulphuric acid with a lead or aluminium cathode (negative terminal). Current causes aluminium at the surface to oxidise into Al₂O₃, forming a hard porous layer that grows both outward and into the material. Sulphuric acid simultaneously dissolves the base of each growing pore, which is what creates the open-pore structure that accepts dye. Temperature and current density control the result – see the calculator below. | 18–22°C. 1.0–2.0 A/dm². Duration calculated from surface area and current density. |
| 5 | Dye | Organic dye is absorbed into the open pores. Time in the dye bath controls depth of colour. The part must go into the dye immediately after anodising and cold rinsing – do not let the part dry out or sit too long before dyeing as the pores begin to close. Skip entirely for natural (silver) anodised finish. | 55–65°C recommended for most dyes. 30 seconds to 15 minutes. |
| 6 | Seal | Hot water or nickel acetate solution converts the aluminium hydroxide at the pore walls into a hydrated monohydrate (boehmite), physically closing the pores and locking in the dye. Boiling distilled water works and is the simplest option. Nickel acetate sealer at 80°C is the commercial standard and gives slightly better colour retention. | Boiling water: 20 min. Nickel acetate: 80°C for 20 min. Use distilled water. |
What You Actually Need
Tank
Any plastic or glass container sized to the work. HDPE buckets (5–10 litre) are ideal for small parts. Do not use metal containers. The acid will last for many anodising runs if you avoid dragging contamination in from previous steps – rinse parts between tanks.
Acid bath
15–20% sulphuric acid by volume. The easiest source is lead-acid battery electrolyte (typically sold as 1270 SG battery acid), diluted 50:50 with distilled water. This gives roughly 20% sulphuric, which sits at the upper end of the usable range. Tap water can be used but mineral contamination causes smutty deposits – use distilled water wherever possible.
Power supply
A manual DC bench supply with adjustable voltage and current limiting is the best option. A manual 12V battery charger works for small parts – the 12–15V output is usually enough to sustain the required current density. Do not use an automatic charger: as the oxide layer builds resistance, voltage rises and an automatic charger interprets this as a fully-charged battery and tapers down the current, which kills the anodising.
Ammeter
Essential. You cannot run the process correctly without knowing the actual current being drawn. Current density is the critical process variable – voltage is just whatever is needed to push that current through the bath. A 0–10A DC ammeter in series with the circuit is sufficient for most small-scale work.
Cathode
Lead sheet or 6061/6063 aluminium plate. The cathode area should be at least equal to the anode surface area – ideally 1.5–2x. Two cathodes on opposing sides of the tank gives more even current distribution on complex parts. Only lead, titanium or aluminium should contact the acid – any other metal will contaminate the bath.
Hanging wire
Aluminium wire (12 AWG / ~2mm) for connecting parts to the positive terminal and suspending them in the tanks. Aluminium wire anodises along with the part and must be stripped or replaced each time. Titanium wire does not anodise and is reusable indefinitely, but harder to source. Wherever the wire contacts the part, there will be no anodising and no dye uptake – position the connection point where it will not show on the finished part.
Thermometer
Acid temperature is a critical variable. Above 25°C the oxide layer dissolves faster than it builds and the part will pit or burn. Below 15°C the layer becomes hard and dark (approaching Type III territory) and standard current densities may not sustain. A cheap aquarium thermometer is sufficient. Monitor throughout the run – the acid heats up during anodising.
Agitation
An aquarium air pump feeding a bubble line at the base of the tank keeps acid temperature uniform and prevents localised heating around the part. Not strictly required for very small parts and short runs, but strongly recommended.
Anodising Calculator
The two numbers you need to control are current density (amps per unit area of the part) and total charge passed (amp-minutes per unit area). Get both right and you get a consistent, dyeable, hard coating. Get either wrong and you get nothing or a burnt part.
Current Density and Duration Calculator
Enter the total exposed surface area of the part, set your target current density, and the calculator outputs the required current and anodising time. Both metric (cm²) and imperial (in²) inputs are supported.
Full Type II coating (~25 µm) requires 80 A·min per dm² of part surface area.
Duration (min) = (80 × area_dm²) ÷ current_A
Decorative coating (~12 µm) uses 40 A·min/dm² – half the time, half the thickness. Sufficient for dye uptake and corrosion protection on non-structural parts.
Current density in A/dm² × area in dm² = required current in amps.
Adjusting acid concentration and cathode area affects how much current a given voltage pushes – use these to dial in your target current density.
Alloy Behaviour
The alloying elements in aluminium affect how easily it anodises, what surface preparation it needs, and how consistently it takes dye. If colour matching across multiple parts matters, they all need to be the same alloy, processed identically at the same temperature.
| Alloy | Anodising | Notes |
|---|---|---|
| 1050 / 1100 Pure / near-pure |
Excellent | Easiest to anodise. Bright, clear coatings. Low strength – rarely used for fabricated parts. |
| 6061 / 6082 Mg-Si series |
Very good | The workshop standard. Anodises consistently with or without etch. Takes dye well. Desmut not usually required. This is what most fabricated brackets, rails, and panels will be. |
| 5083 / 5052 Mg series |
Good | Anodises well. Slightly warmer tone than 6xxx. Common in sheet and plate fabrication. |
| 7075 Zn-Mg-Cu series |
Acceptable | Can be anodised but colour is inconsistent and tends towards yellow-brown. Desmut required. Not ideal for decorative work. Widely used in aerospace and motorsport for its strength – accept the cosmetic limitations. |
| 2024 Cu-Mg series |
Difficult | High copper content causes heavy smut after etching. Desmut is essential. Coating quality is inconsistent and colour depth is limited. Process parameters need tighter control than 6xxx alloys. |
| Cast alloys High Si content |
Problematic | Silicon particles in cast alloys do not anodise and leave grey-black patches in the coating. Desmut is required but does not fully resolve the cosmetic problem. Functional anodising for corrosion resistance is achievable but decorative results are poor. |
What Goes Wrong and Why
The electrical connection between the wire and the part failed at some point during the anodising run. The wire anodised successfully because it maintained contact with the positive terminal, but the part itself was not in the circuit. The most common causes are: the wire was not twisted tight enough into the tapped hole, the contact point was contaminated with oxide from a previous run, or the connection corroded during the run. Force the wire tighter into the hole – it is softer than the alloy and will deform to fill the thread without damaging it. If the part has not been sealed, return it to the tank after fixing the connection and re-anodise.
Temperature too high, current density too high, or both. Sulphuric acid becomes increasingly aggressive above 25°C, dissolving the coating faster than it builds. Localised heating around the part – which happens when the bath is not agitated – has the same effect. Check the thermometer during the run, not just at the start. Add bubble agitation. If the bath has been used for multiple consecutive runs without cooling, wait until it returns to operating temperature before starting the next part.
Several possible causes: insufficient anodising time (the pores are not deep enough to hold dye), too little current during the run (low current density produces a thinner, less porous layer), contamination in the dye bath from acid carry-over (rinse thoroughly between tanks), or the part was allowed to dry out before dyeing. The pores begin to close as soon as the part is removed from the acid. Cold rinse immediately and transfer to the dye bath promptly.
The connection to the part has failed. Voltage rises as the oxide layer builds (oxide is resistive), which is normal – a gradual rise is expected. A sudden drop indicates the wire has lost contact. Stop the run, fix the connection, and restart. If the part has not been in the tank long enough to have built a full oxide layer, it may still be possible to strip and retry.
As the oxide layer grows, its electrical resistance increases and the voltage across the bath rises. An automatic battery charger interprets rising voltage as a fully-charged battery and reduces output. The anodising stops growing and you get a thin, inconsistent coating. Use only a manual battery charger or a DC bench supply. On some chargers the "boost" or "start" mode bypasses the automatic taper – test on a scrap part first.
Iron or steel contamination. Any steel that contacts the acid will contaminate it and degrade all subsequent anodising. Only aluminium, lead, or titanium should enter the bath. Replace the acid if it has turned brown – there is no recovering it.
Yes, provided it has not been sealed. Sodium hydroxide (caustic soda / lye) solution dissolves the oxide layer – the same solution used for etching, left in contact longer. Strip back to bare aluminium, rinse thoroughly, then restart from the clean step. After sealing, the monohydrate layer is significantly harder to remove and you will need to go back to bare metal mechanically or with a stronger caustic soak.
Colour and Finish
The pore diameter after Type II anodising is in the 10–30 nm range. Dye molecules must be small enough to enter. This rules out most pigment-based colourants and means you need true organic dyes, not paints or inks with suspended particles.
Dedicated anodising dyes (Aluminium Black, Aluminium Blue and similar) are the reliable option. Powder-based dyes typically mix at 2 g/litre of distilled water; black tends to need 4–5 g/litre for full depth. Dye baths can be reused many times if you prevent acid contamination from carry-over. Rinse parts thoroughly in cold water between the acid tank and the dye bath.
Time in the dye bath controls depth of colour. 30 seconds gives a pastel shade; 15 minutes gives a deep solid colour. Warm dye at 55–65°C penetrates faster and more evenly. The yellow tint that naturally develops at higher current densities slightly shifts the final dye colour – a nominally blue dye over a yellow-tinged coating reads slightly green. Working at lower current density (1.0–1.2 A/dm²) gives a clearer base, though it requires longer anodising times.
Workshop Examples
The following parts were all anodised on a bucket-based setup in the EBD workshop. Acid tank: 10-litre HDPE bucket, lead cathodes, aquarium air agitation. Power: manual 12V DC bench supply. Dye: dedicated anodising dye powder.


Left to right: the dye tank mid-run (black dye, air agitation visible); blue anodised fuel rail on the PPP-106 engine build with Yamaha R6 ITBs; matte anodised plate showing natural machined surface preserved through the process; anodised fuse plate showing consistent colour and hard finish on a fabricated aluminium panel. Click any image to enlarge.
Sourcing the Kit
Most of what you need for a small workshop setup is available from general electronics and laboratory suppliers. The items below are the ones worth spending money on rather than improvising.
Battery acid (sulphuric electrolyte) is available from any motor factor that sells replacement batteries – buy it as pre-mixed battery electrolyte rather than concentrated sulphuric acid. Distilled water is widely available from supermarkets and motor factors. HDPE buckets, lead sheet, and aquarium air pumps are inexpensive from general hardware and aquatics suppliers.
Frequently Asked Questions
15 to 20% sulphuric acid by volume is the standard range for Type II anodising. The easiest way to achieve this at home is to dilute lead-acid battery electrolyte (sold as 1270 SG battery acid) 50:50 with distilled water. This gives approximately 20% sulphuric, which sits at the upper end of the usable range. Always add acid to water, never the reverse - adding water to concentrated acid generates intense heat and can cause the solution to boil and spit.
Duration depends on the surface area of the part and the current density you are running. The standard rule for a full Type II coating (approximately 25 microns) is 80 amp-minutes per square decimetre of part surface. At 1.5 A/dm², a part with 200 cm² of surface area (2 dm²) needs 3 amps and takes 53 minutes. A decorative coating at half thickness takes half the time. Use the calculator on this page to work out the figures for your specific part.
You can anodise cast aluminium but the results are rarely good enough for decorative work. Cast alloys contain high levels of silicon, and silicon particles do not anodise - they remain as dark grey or black patches in the coating regardless of how carefully you run the process. A desmut step after etching is essential, but it does not fully resolve the cosmetic problem. For functional corrosion protection on cast parts it is achievable; for a clean, evenly dyed finish, use wrought alloy (6061 or 6082) wherever possible.
A manual battery charger works for small parts. The key word is manual - automatic battery chargers detect the rising voltage across the anodising bath (a natural consequence of the oxide layer building resistance) and interpret it as a fully-charged battery, tapering down the current and stalling the process. A manual charger with a few fixed settings maintains output regardless. A variable DC bench supply with current limiting is better still because you can set the exact target current and the supply adjusts voltage automatically to maintain it throughout the run. For monitoring current, a panel-mount voltmeter/ammeter wired into the circuit gives you simultaneous voltage and current readout and suits a permanent setup; a clamp meter is the no-wiring option for occasional use.
You need true organic dyes with a molecule small enough to enter the anodic pores, which are 10 to 30 nanometres in diameter. Dedicated anodising dyes (sold as aluminium anodising dye powder in black, blue, bronze, red, gold and other colours) are the reliable choice. Artist inks and food dyes can work with variable results. Paint, acrylic ink, or anything with suspended pigment particles will not work - the particles are too large to enter the pores and will sit on the surface and wash off. Black dye requires roughly double the concentration of other colours for full depth.
The most common causes are a failed or intermittent electrical connection during the run, insufficient anodising time producing a thin pore structure that does not hold dye evenly, acid carry-over contaminating the dye bath, or the part drying out between the acid tank and the dye bath. The pores begin to close as soon as the part is removed from the acid - rinse immediately in cold water and transfer to the dye bath without delay. Alloy variation is also a factor: mixing parts from different alloys in the same dye bath will give different colour depths even with identical process conditions.
The simplest method is boiling distilled water for 20 minutes. This converts the aluminium hydroxide at the pore walls into boehmite, a harder monohydrate that physically closes around the dye. Use distilled water rather than tap water to avoid mineral deposits on the surface. The commercial alternative is nickel acetate sealer at 80°C for 20 minutes, which gives slightly better colour retention because it operates below boiling and causes less dye leaching during the sealing process. Avoid low-temperature sealers marketed as convenient - most produce noticeably less dye retention.
The practical solution for a small setup is an insulated cool box as the outer container, with your plastic anodising tank sitting inside it. The insulation buffers temperature change in both directions - it slows the bath heating up during a run in a warm workshop, and slows it cooling down in a cold garage in winter. For active cooling, fill the gap between the inner tank and the cool box with ice water. For cold weather, the insulation alone is usually sufficient to maintain a stable temperature once the bath has reached operating temperature. An aquarium thermometer in the bath lets you monitor throughout the run rather than relying on ambient temperature as a guide.
Type II is standard decorative sulphuric anodising at room temperature (18-22°C), producing a coating of approximately 5-25 microns. It is dyeable and suitable for corrosion protection and appearance. Type III (hard anodising) uses lower temperature (around 0°C), higher current density, and significantly higher voltage to produce coatings of 25-100 microns. The resulting layer is harder, more wear-resistant, and darker in colour - typically grey or black depending on alloy. Type III is not achievable with a standard battery charger due to the voltage requirement, and the temperature control needed is beyond a simple workshop setup.